 How-to
7 Steps to a Modern Outdoor Living Space Design
Quick Summary
A modern outdoor living space is an extension of your home that you can actually use, with clean lines, a few clear zones for cooking, eating and relaxing, and lighting that works after dark. Good designs pair simple shapes and neutral colors with natural materials like wood, stone, and metal. Decide what the space must do before you start planning.
- Track sun exposure, drainage, wind, and slope for a full day before you draw anything.
- Set your budget first and request a line-item estimate rather than a lump sum.
- Lock gas, water, and electrical routing before the concrete is poured.
- Choose materials by how they fail, not by how they look in a showroom.
- Use porcelain or aluminum in wet or shaded sites, since wood stays damp and grows mildew.
Table of Contents
- What a Modern Outdoor Living Space Includes
- Step 1: Assess Your Site, Climate, and Orientation
- Step 2: Set a Realistic Budget and Know the Cost Trade-Offs
- Step 3: Plan the Layout for Small and Large Patios
- Step 4: Choose Durable, Low-Maintenance Materials and Modern Finishes
- Step 5: Plan the Outdoor Kitchen, Utilities, and Lighting
- Step 6: Integrate Planting, Privacy, and Water Management
- Frequently Asked Questions
- Booking Your Design Consultation With Terra-Chic Remodeling
What a Modern Outdoor Living Space Includes
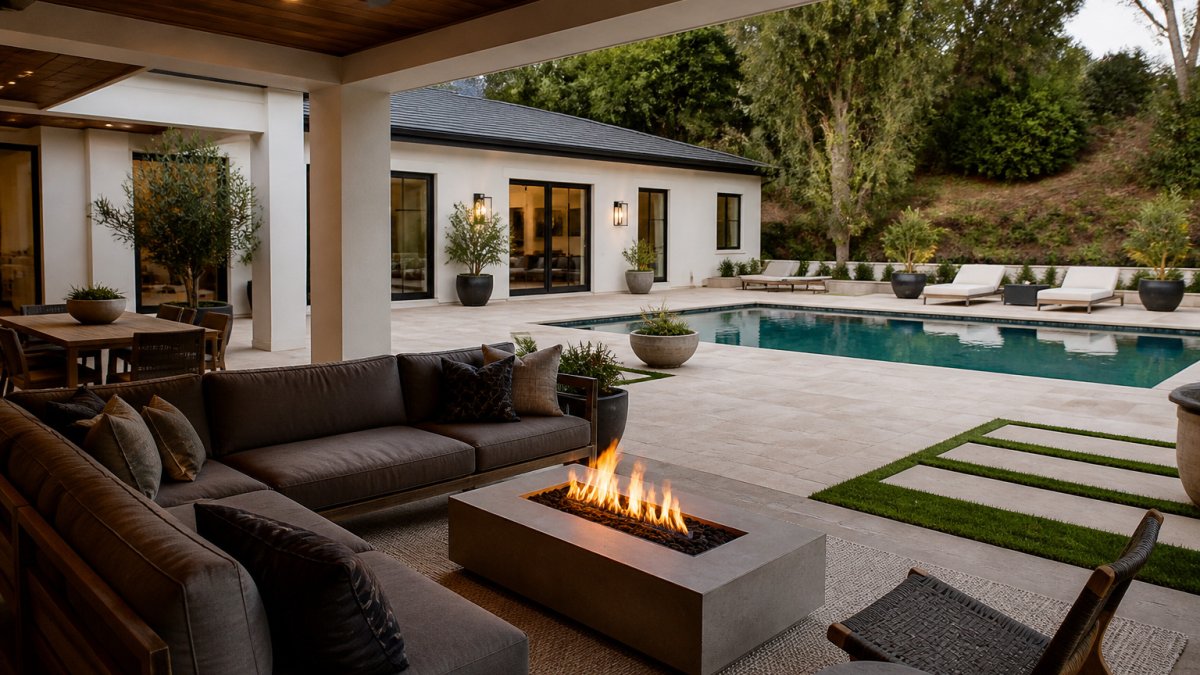
A modern outdoor living space is an extension of your home that you can actually use. It has a clear purpose, clean lines, and a few zones for cooking, eating, and relaxing. Most good designs include a covered or semi-covered area, a dining or lounge zone, and lighting that works after dark.
Modern design leans on simple shapes, neutral colors, and mixed natural materials like wood, stone, and metal. Think sleek furniture, a few strong focal points, and very little clutter. The goal is a space that feels like a room, not an afterthought.
Before you start, decide what you want the space to do. A family that cooks on weekends needs different features than a couple that hosts friends in the evenings.
Step 1: Assess Your Site, Climate, and Orientation
Your site decides what is possible. Start by noting which direction your yard faces, where the sun sits at different times of day, and where shade falls in summer. A west-facing patio gets hot in the afternoon, while a north-facing one may stay cool and dim.
Check these site factors before you draw anything:
- Sun exposure: Track sun and shade for a full day.
- Drainage: Look for low spots where water pools after rain.
- Wind: Note which areas get strong gusts.
- Access: Plan how materials and equipment will reach the back of the lot.
- Slope: Steep grades may need retaining walls or stepped levels.
If your home is in Southern California, seismic conditions matter too. Our guide on seismic safety for home additions explains what to check for covered and structural outdoor spaces. Ask your designer how these factors affect foundations and footings.
Step 2: Set a Realistic Budget and Know the Cost Trade-Offs
Set your budget before you pick materials, because the finishes you fall in love with will otherwise set the budget for you. Exact pricing depends on your site and scope, so request a written estimate from Terra-Chic Remodeling on its website for current figures.
Budget tiers and what they buy
- Refresh tier (surface and furnishing only): Reuse the existing slab or patio, replace furniture and lighting, add planters and soft goods. This is the lowest-cost path and the right choice when the hardscape is sound and drainage already works.
- Mid tier (new hardscape plus shade): New pavers or poured concrete, a pergola or shade sail, built-in seating, and layered lighting. This is where most whole-backyard projects land, because structure and hardscape are the two largest line items.
- Full build (kitchen, utilities, structures): Adds gas, water, and electrical runs, a cooking zone, a fire feature, and possibly a covered roof. Utilities and permits are what push a project into this tier, not the furniture.
Trade-offs that change the number
- Pavers vs. poured concrete: Pavers cost more per square foot in materials and labor but can be lifted and reset if a utility line fails underneath. Complete exterior renovations are one way to see how that work fits into a larger project. Poured concrete is cheaper upfront but expensive to cut and repair later.
- Pergola vs. solid roof: An open pergola costs less and needs no structural engineering in most cases; a solid covered roof adds framing, roofing, and often permits, but extends usable season and protects furniture.
- Built-in vs. freestanding: Built-in seating and counters raise labor and material cost but eliminate the annual replacement cycle of freestanding furniture.
- Gas vs. wood-burning fire feature: A gas line adds a plumbing trade and inspection; a wood-burning pit is cheaper to install but adds ash cleanup and local burn-day restrictions.
How to prioritize spending
Spend first on the parts you touch every day: the seating surface, the cooking zone, and lighting. Spend last on decorative extras, water features, accent walls, and specialty planters, which can be added in a later phase.
Step 3: Plan the Layout for Small and Large Patios
Layout turns your budget and site into a plan. Small patios need careful zoning so they do not feel crowded. Large patios need structure so they do not feel empty.
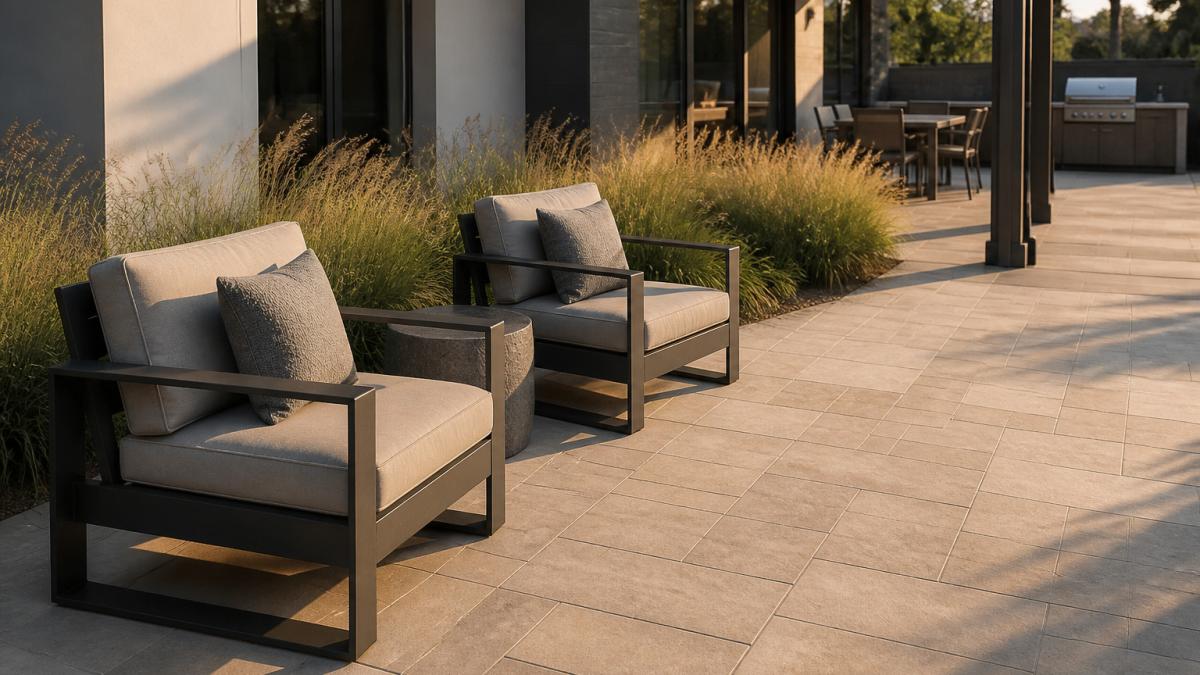
For small patios:
- Use one main seating group instead of several small ones.
- Choose furniture with narrow profiles and clean edges.
- Keep a clear walkway of at least 3 feet.
For large patios:
- Divide the space into zones, such as dining, lounging, and cooking.
- Use a pergola or change in paving to define each area.
- Add a central focal point, like a fire feature or water element.
Visualize the flow between the house and the yard. The patio should feel connected to indoor rooms, not separate from them.
Step 4: Choose Durable, Low-Maintenance Materials and Modern Finishes
Outdoor materials face sun, rain, freeze-thaw cycles, and temperature swings every day. The right choice is not the most expensive one, it is the one whose failure mode you can live with and whose upkeep you will actually do. Compare materials on four axes: weather resistance, maintenance interval, repairability, and lifecycle cost.
Hardscape
- Porcelain pavers: Dense and non-porous, so they resist staining, fading, and freeze-thaw damage, and they stay cooler underfoot than dark stone. They are typically set on a pedestal or mortar system; pedestal installation makes them easy to lift for drainage or utility access.
- Natural stone (travertine, bluestone, granite): Durable and repairable, but porous stones need sealing every few years and can stain from tannins and rust.
- Poured concrete: Lowest upfront cost, but it cracks, and cracks are permanent. Control joints and a proper base reduce the risk; repair means cutting and patching, which never matches perfectly.
- Composite decking: Resists rot and insects and needs only soap-and-water cleaning, but it expands and contracts with heat and can fade over many years.
Furniture and structures
- Powder-coated aluminum: Light, rust-resistant, and the default for modern frames. Check that welds are sealed and that the powder coat is not chipped at joints, where corrosion starts.
- Stainless steel (304 or 316): 316 marine-grade hardware and fasteners hold up near pools and coastal air; 304 is fine inland. Ordinary steel hardware will rust and stain surrounding surfaces.
- Teak and other dense woods: Naturally rot-resistant and repairable by sanding, but they weather to gray unless oiled annually.
- Treated or composite wood: Gives warmth without heavy maintenance; composite needs no sealing but cannot be sanded back to new.
Finishes and color
Neutral palettes of gray, white, sand, and charcoal fit modern design and hide dust and pollen well. Add texture with cushions, woven accents, and natural wood, but keep the color scheme tight so the space reads as one room. Matte finishes hide scratches better than gloss; gloss shows every water spot.
Matching material to climate
- Hot, sunny sites: Choose light-colored, heat-reflective pavers and shade structures; dark stone and metal get too hot to touch.
- Freeze-thaw climates: Porcelain and stone set on a proper base outperform poured concrete, which heaves and cracks.
- Coastal air: Specify 316 stainless hardware and avoid untreated steel and cheap aluminum.
- Wet, shaded sites: Favor porcelain, composite, and aluminum over wood, which stays damp and grows mildew.
The article compares common outdoor materials by how they fail and how much upkeep they need.
| Material | Maintenance | Key difference |
|---|---|---|
| Porcelain pavers | Low | Dense, non-porous; resists staining and freeze-thaw damage |
| Natural stone | Sealing every few years | Porous; can stain from tannins and rust |
| Poured concrete | Repair by patching | Cheapest upfront; cracks are permanent |
| Composite decking | Soap and water | Resists rot and insects; can fade over years |
| Powder-coated aluminum | Check joints for chips | Light and rust-resistant |
| Teak | Oil annually | Naturally rot-resistant; weathers to gray if untreated |
Step 5: Plan the Outdoor Kitchen, Utilities, and Lighting
An outdoor kitchen works best when it is planned with the house. Place the grill or cooking station near the door, with counter space on both sides. Outdoor kitchens and BBQ islands show the cooking setups available for this layout. Plan gas, water, and electrical runs before the concrete is poured, because changing them later is costly.
Key planning points:
- Gas and electrical: Confirm line locations and capacity early.
- Ventilation: Keep smoke away from seating and doorways.
- Weather protection: Use covered counters and sealed electrical boxes.
- Lighting: Layer task lights over the cooking area with softer ambient lights for dining.
Lighting is often the most overlooked part of outdoor design. Good lighting makes the space usable at night and adds a warm, layered feel.
Step 6: Integrate Planting, Privacy, and Water Management
Plants, fences, and drainage complete the design. Choose plants that suit your climate and need little water. Ornamental grasses and drought-tolerant shrubs add movement and color without heavy irrigation.
Plan these elements together:
- Privacy: Use slatted fencing, hedges, or screens to block neighbors. Fence and gate services cover the boundary options for this kind of privacy.
- Planting: Group plants by water needs so irrigation stays efficient.
- Irrigation: Drip lines and smart controllers reduce waste. Landscaping irrigation covers how these systems are designed and installed.
- Drainage: Slope hardscape away from the house and add drain channels where needed.
Frequently Asked Questions
How do you design a modern outdoor living space?
Start with the site before the style. Note where the sun sits at different times of day, where wind and noise come from, and which views you want to keep or block. Then define the zones you need, such as dining, lounging, and cooking, and arrange them so traffic flows from the house outward. Clean lines, modular forms, and a restrained palette of neutral colors give the space its modern character. Pricing for a build like this depends on size, materials, and scope, so request a site-specific quote from Terra-Chic Remodeling on its website.
What materials work best for a modern outdoor patio?
Choose materials that hold up to Southern California sun, heat, and occasional heavy rain with little upkeep. Large-format porcelain or concrete pavers, composite decking, and powder-coated metal framing are common choices for a modern look. Pair hard surfaces with organic textures such as wood-look accents or natural stone to add warmth. Ask for samples in your actual lighting before you commit, since finishes can look very different outdoors.
How do you create privacy in a modern outdoor living space?
Use layered screening rather than a single solid fence. Slatted wood or metal screens, a pergola with climbing plants, and tall ornamental grasses can block sightlines while still letting air and light through. Position screens where they cut views from neighboring windows and second stories, not just at ground level. A screened-in porch or covered patio is another option when you need privacy and shade in the same structure.
How can you make an outdoor living space usable year-round?
Plan for shade, heating, and lighting from the start. A pergola or covered patio provides afternoon shade, while an outdoor fireplace or heater extends evenings during cooler months. Layered ambient lighting, with low path lights, wall sconces, and dimmable fixtures, makes the space comfortable after dark. Running gas, power, and water lines during construction costs far less than adding them later.
Booking Your Design Consultation With Terra-Chic Remodeling
A modern outdoor living space takes planning across site, budget, layout, materials, and utilities. Terra-Chic Remodeling brings these decisions together in one design-build process, from the first sketch to final installation. Request a consultation to review your site, get a written estimate, and discuss how the patio, kitchen, and landscape can work as one space.